Using the overlay service

One of the great things about developing with Umbraco is the many ways you can show your users information, and one of the hard things with umbraco is there are so many ways to show information!.

The overlay service is available in Umbraco v8 and v7.13+ and it allows you to put dialog boxes over the rest of the page.

Overlays as confirmation box.

Probably the quickest way you can use the overlay service is as a confirmation dialog for your users.

A confirm overlay

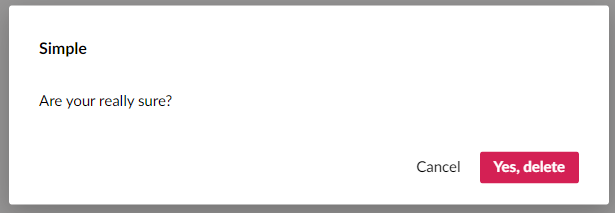
A confirm overlay requires a simplified set of options so you don’t have to set to much to get it to show.

var options = {
title: 'Simple Confirm',
content: 'Are you sure you want to?',
disableBackdropClick: true,
disableEscKey: true,
confirmType: 'delete',
submit: function () {
overlayService.close();
}
};

overlayService.confirm(options);

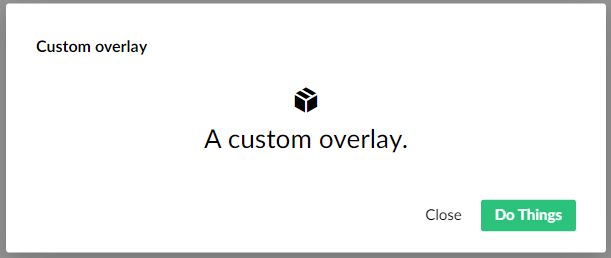
More complex overlays.

At the more powerful end of things the overlay service lets you provide your own custom view to use in the overlay (via the view option).

var options = {
view: Umbraco.Sys.ServerVariables.umbracoSettings.appPluginsPath + '/DoStuff.Dashboard/overlay/customOverlay.html',
title: 'Custom overlay',
description: 'A custom view in an overlay',
disableBackdropClick: true,
disableEscKey: true,
submitButtonLabel: 'Submit',
closeButtonLabel: 'Close',
submit: function (model) {
// what happens when the user presses submit
overlayService.close();
},
close: function () {
overlayService.close();
}
}

The view for your overlay, works in a similar way to other views in umbraco in that you can have a controller, and you get to control the html.

Example view:

<div ng-controller="doStuffCustomOverlayController as vm">
<div class="flex justify-center flex-column items-center">
<i class="large icon {{vm.icon}}"></i>
<h3>{{vm.content}}</h3>
</div>
</div>

A custom overlay

N.B For an overlay, your custom view sits beneath the title & description and above the buttons, that is you don’t get to control those values directly in your markup. but they are available via $scope.model within your controller.

Multi-step overlays

The overlay service is really designed to show the user a dialog over the content and then do a thing and go away. but there are cases where you might want to have multiple steps in the dialog, or have something that is long running.

For example in uSync.Complete we have multiple steps to the publish process where users have to pick servers and options before we push the content to another site.

uSync Publishers multi-step overlay,

While this is a complex use of the overlay service, it is possible to do this when you understand the flow of an overlay dialog.

All button presses go back to the parent.

So when ever a user presses a button on the dialog they will be hitting hte submit or close functions of the dialog.

While you could indeed intercept these in your overlay controller, they will almost always go back to the submit and close functions you setup when opening the overlay.

options.submit = function(model) {
// this is called when user hits 'submit' button.
overlayService.close();
}

As you can see here we are responsible for calling the overlayService.close() function. So if we don’t then the overlay doesn’t close.

options.submit = function(model) {
// this is called when user hits 'submit' button.
if (model.complete) {
overlayService.close();
}
else {
// not complete.
}
}

When the process is not complete we need to call something to carry on the process. Here we could call a method in the calling controller, but as we have access to the model that is passed between the calling and overlay controller we can put the method in the overlay.

else {
model.processStep();
}

within our overlay process we need to make sure the processStep method is attached to the model.

function customOverlayController($scope) {

var vm = this;
$scope.model.complete = false;
// add method to model, so we can call it from parent
$scope.model.processStep = processStep;

....
function processStep() {
// do our stuff, when we have finished
// set complete to true.
$scope.model.complete = true;
}
}

Show me the code.

You can see this code in the DoStuffWithUmbraco repo

Open a custom overlay from overlayController.js

function openCustomOverlay() {


var options = {
view: Umbraco.Sys.ServerVariables.umbracoSettings.appPluginsPath + '/DoStuff.Dashboard/overlay/customOverlay.html',
title: 'Custom overlay',
description: 'A custom view in an overlay',
disableBackdropClick: true,
disableEscKey: true,
submitButtonLabel: 'Do Things',
closeButtonLable: 'Close',
submit: function (model) {

// multi-step overlay, will still call the submit
// as its the only button,
// but you can use values in the model, to check
// if you are ready to close.
// simple example, we have a process function
// (in the overlay's controller) that does stuff
// and sets complete when done.

// when complete is true, we close the overlay.
// until then we keep calling process.

if (model.complete) {
overlayService.close();
}
else {
model.process();
}

},
close: function () {
overlayService.close();
}

}

overlayService.open(options);

}

customOverlayController.js

(function () {
'use strict';

function customOverlayController($scope) {

var vm = this;
$scope.model.complete = false;

vm.step = 1;

vm.icon = 'icon-box';

vm.content = 'A custom overlay.'

// add method to model, so we can call it from parent
$scope.model.process = process;

function process() {

vm.step++;
$scope.model.description = 'Step ' + vm.step;

switch (vm.step) {
case 2:
vm.icon = 'icon-sprout';
vm.content = 'Do another thing';
$scope.model.submitButtonLabel = 'One last thing';
break;
case 3:
vm.icon = 'icon-check color-green';
vm.content = 'We are done now';
$scope.model.submitButtonLabel = 'Finish';
$scope.model.complete = true;
break;
}


}
}

angular.module('umbraco')
.controller('doStuffCustomOverlayController', customOverlayController);
})();